How to troubleshoot sensor reading error?
There can be a lot of reasons which lead to problems with sensor reading error. Due to this you can follow the steps below, maybe they can help you to solve the problem:Remember to turn of the appliance form electricity, safety is the most important- Check all wires - connection is required to correct work of sensor. If there is a loose, try to put in harder inside
- If problem vanish, your repair is completed
- If no follow the next step
- Take the multimeter tool and check the current flow of the wire. If you have some values, the sensor is fully functional
- When you still have a problem you can constant to engineering team, maybe they can help you or replace the whole device.
Air pressure testing


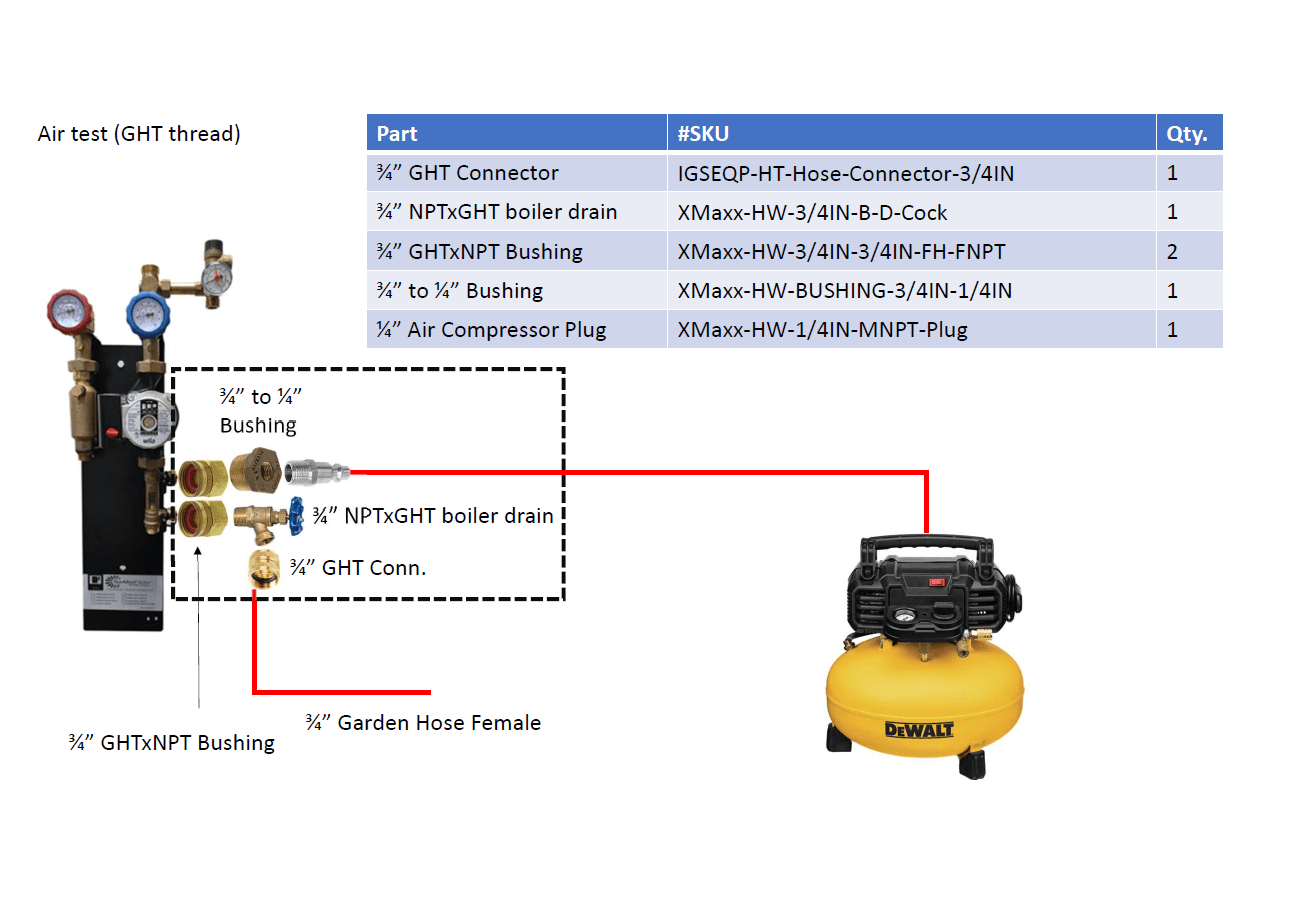
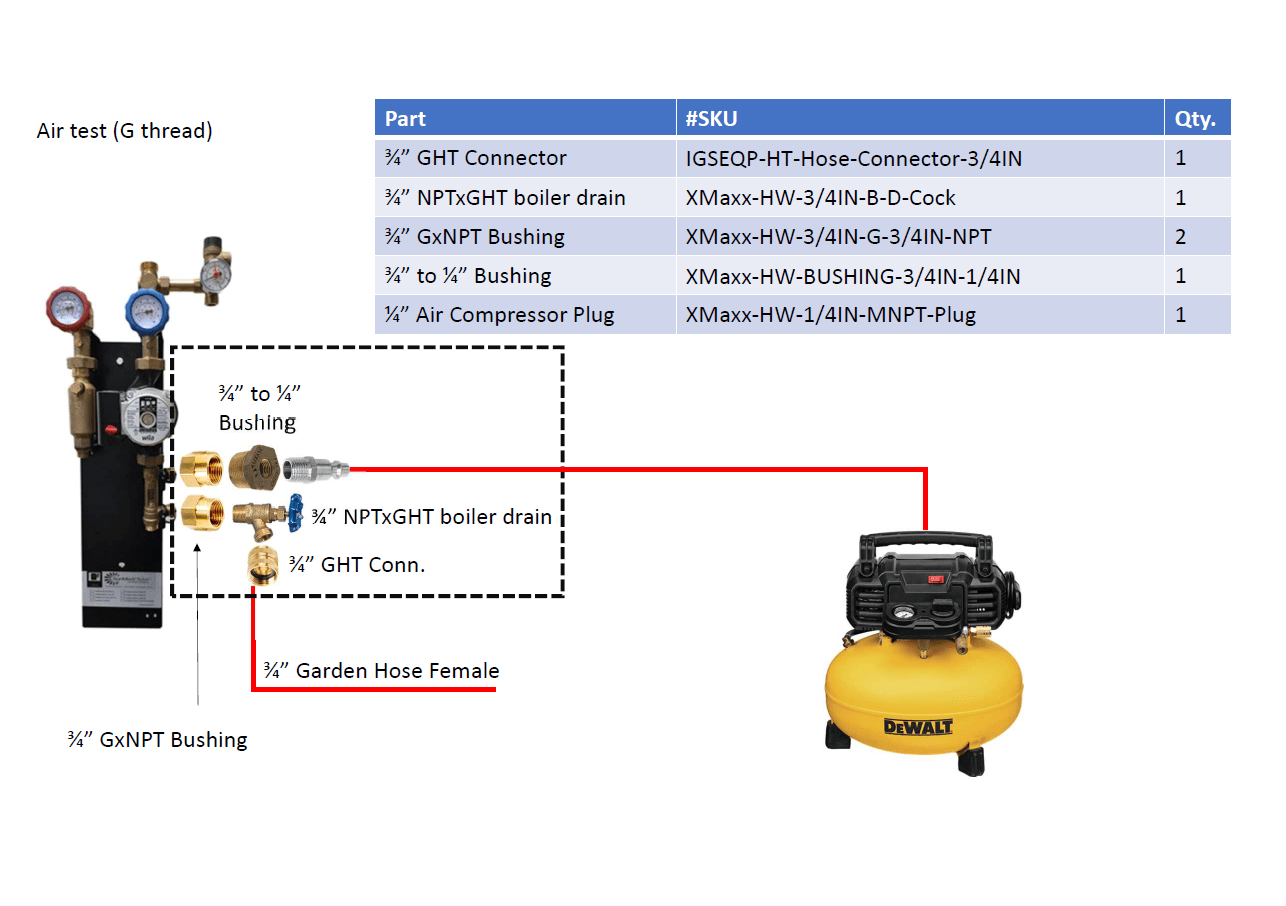
Parts in black box should be pre-assembled. Make sure you are using proper threading kit.
Pressure testing steps
- Before testing make sure system has no fluid inside - drain the system
- Connect Air Test Kit like on the schemes above
- Turn Flow Meter valve in horizontal position - allowing the air to go in via upper charging port
- Open upper and bottom charging port valves (black valves)
- Open boiler drain valve (connected to garden hose)
- Turn on the Air Compressor
- Wait a while for air to circulate in the system
- Close bottom drain port and boiler drain valves
- Build the pressure to 87 PSI
- Close upper charging port valve and turn off the Air Compressor
- Verify if no air leaks in the system
- When system does not loose pressure for 10 minutes Air Test is completed.
Charging the Solar Hot Water System
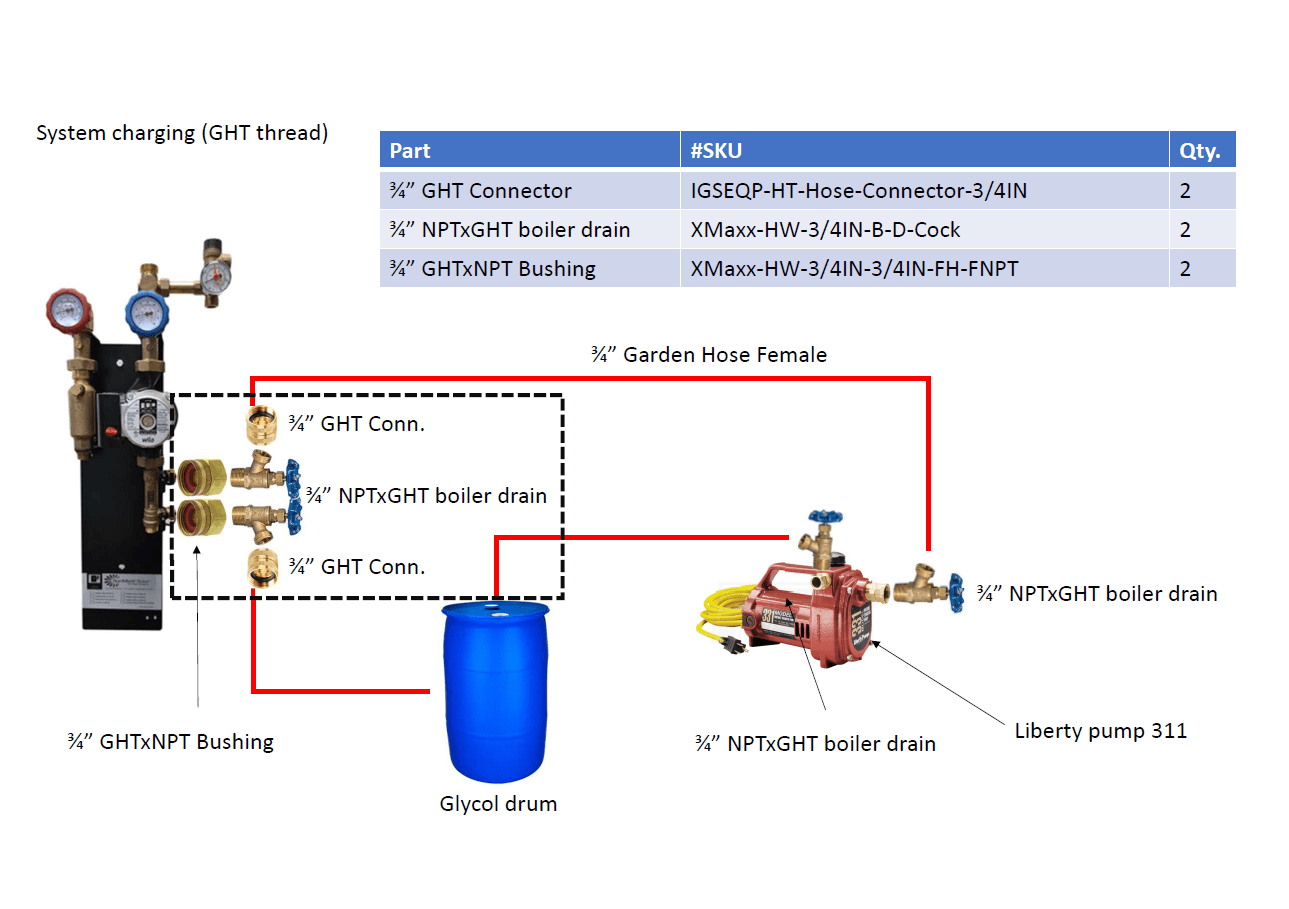
System charging kits schemes


Parts in black box should be pre-assembled. Make sure you are using proper threading kit.
System charging steps
- Makes sure air vents on roof are closed (or glycol will leak out).
- Prepare transfer pump, hoses, and glycol for charging of solar loop.
- You will need mixture of 50% glycol, 50% water. Approximately 0.5 gal per one collector.
- Connect discharge pump to top connection on solar pump station
- Connect return hose to glycol drum (from the bottom connection on solar pump station) .
- Prime transfer pump (make sure you have pressure).
- Open fill/flush port valves on pump station (black valves).
- Make sure flow meter valve is turned perpendicular to the valve body (this is fill mode).
- Turn the solar pump on in manual mode (usulally relay 1); which will turn on the solar pump.Make sure your red / blue temp gauges are not closed (they are open).
- Start transfer pump, build pressure until glycol returns from return hose into glycol drum.
- Make sure suction hose (from transfer pump) is installed below the water line in the glycol drum.
- If you have multiple collector banks; isolate the cold supply on the upper bank (lets the system fill the lower bank first. Let glycol run for 10‐15 minutes; most air should be purged out of the system (you will notice steady stream of glycol from the return line)
- Next, open the upper bank balancing valve and close the bottom bank, let run for 10‐15 minutes
- Open both valves on the collector banks.
- Begin to close the return valve on the fill/flush ports (this will allow for building of circulation loop pressure. Build pressure to 50+ PSI (as long as you have some flow coming out into the glycol drum).
- High pressure pushes the air out of the fluid.
- Bleed the air out of the air bleeding points (air vents in collectors, air vent on pump station, air vent on pump).
- Let system circulate at this pressure for 20‐30 minutes
- Close the fill/flush ports, turn off the transfer pump.
- Turn the flow meter valve to the verticle position; leave the pump in manual mode.
